

The
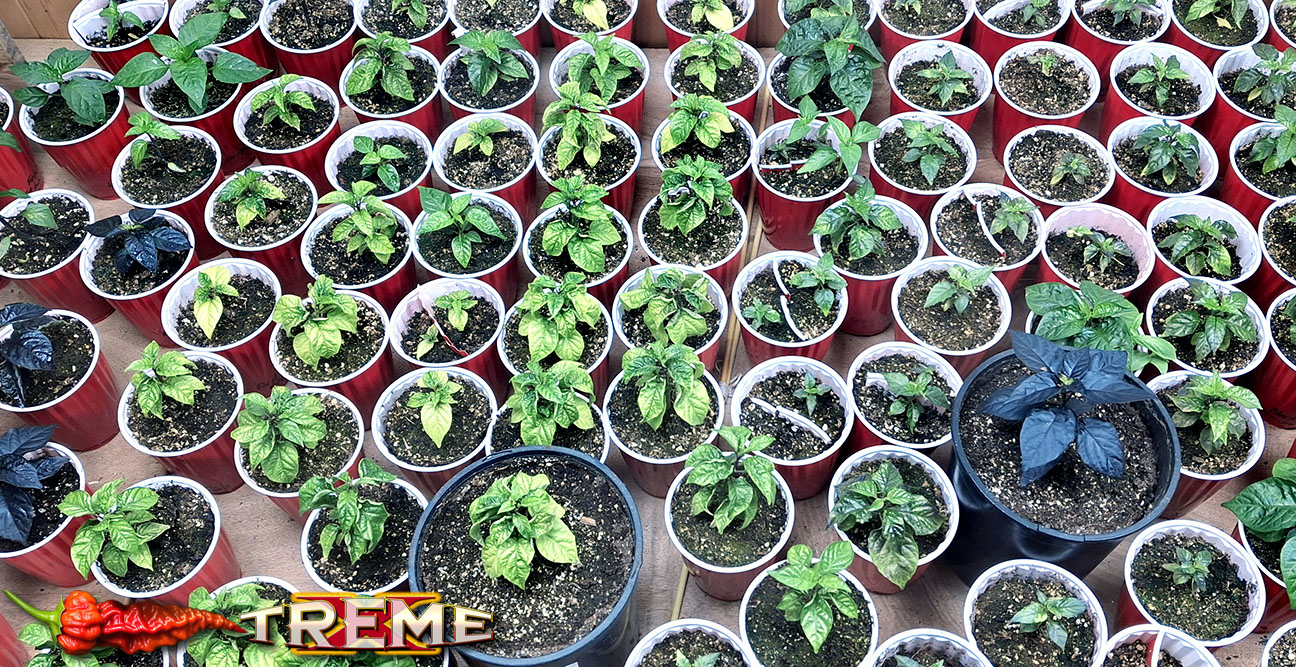
To germinate hot spicy pepper seeds (e.g., from ghost peppers, habaneros, or other hot chili varieties), follow these steps to ensure successful sprouting and healthy seedlings:
1. Prepare the Seeds
Soak seeds: Place seeds in a mason jar or bowl of warm water (around 20–25°C / 68–77°F) for 12–24 hours to soften the seed coat and encourage germination.
Rinse and dry: After soaking, gently rinse the seeds and pat dry with a paper towel.
2. Stratification (Optional)
If the seeds are old or dormant, stratify them to break dormancy:
Cold, moist environment: Place seeds in a sealed container with moist peat moss or vermiculite. Store in the refrigerator (4°C / 39°F) for 2–4 weeks.
Warm, moist environment: If the seeds are fresh, skip stratification.
3. Choose the Right Growing Medium
Soil mix: Use a well-draining mix of equal parts peat moss, perlite, and compost (or a seedling mix).
Container: Use a small pot (4–6 inches deep) with drainage holes.
4. Plant the Seeds
Depth: Plant seeds 1/4 inch (0.6 cm) deep in the soil.
Soil moisture: Keep the soil consistently moist but not waterlogged. Use a paper towel to keep the seeds damp if planting in a container.
5. Provide Optimal Conditions
Temperature: Maintain 20–25°C (68–77°F). Avoid cold (below 15°C / 59°F) or hot (above 30°C / 86°F) environments.
Light: Place the container in indirect sunlight or under grow lights (12–16 hours/day).
Humidity: Use a humidity dome or mason jar to retain moisture and prevent the soil from drying out.
6. Germination Time
Hot peppers (e.g., ghost peppers) typically germinate in 7–14 days.
If seeds do not sprout within 14 days, they may be dormant or dead. Discard and try fresh seeds.
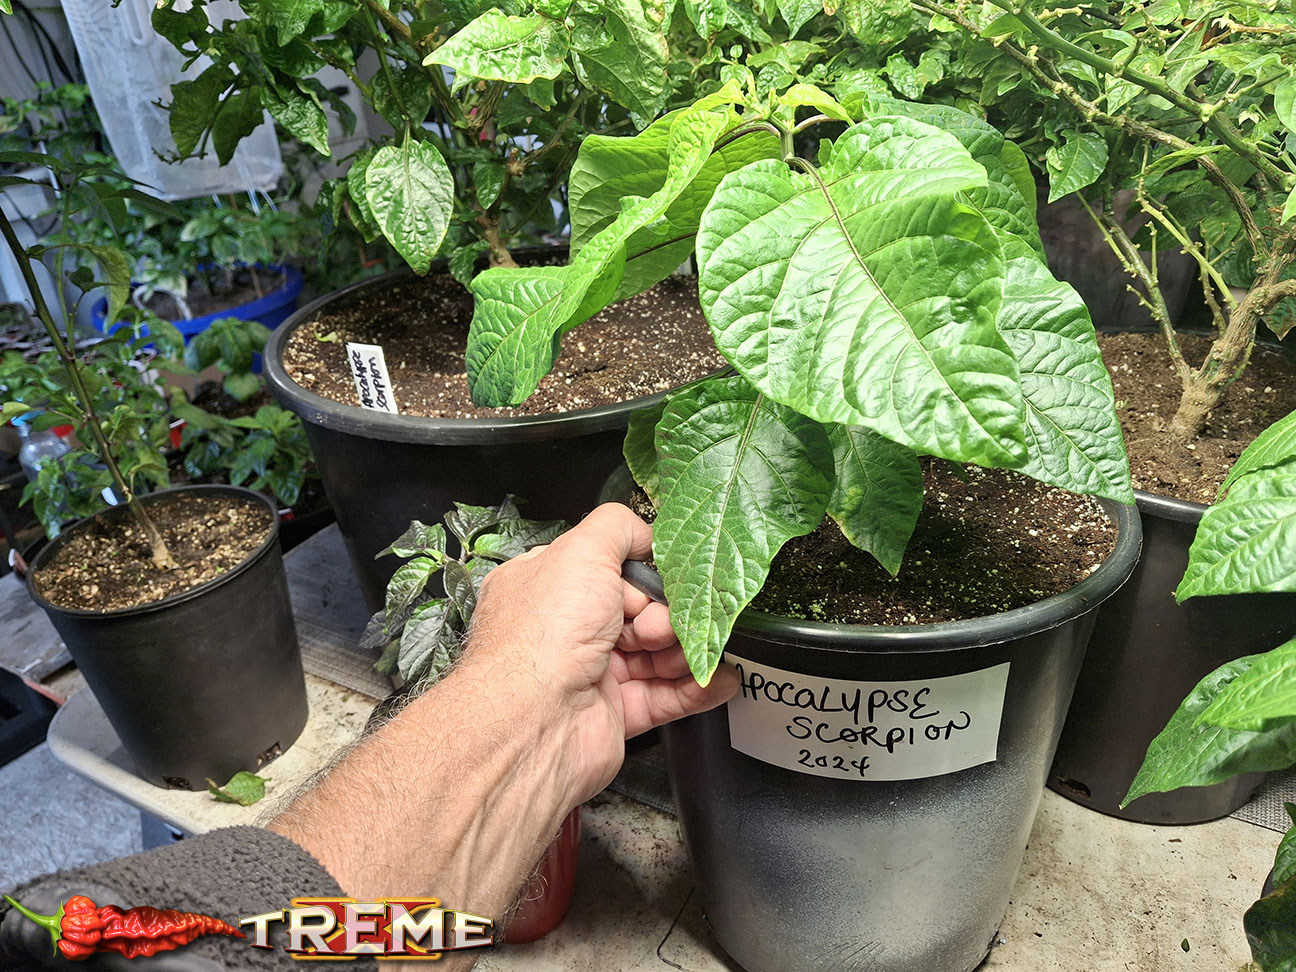
7. Transplanting (Optional)
Once the seedlings are 2–3 inches tall (after 2–4 weeks), transplant them into larger pots or directly into the garden (after the last frost).
Spacing: Keep plants 18–24 inches apart to avoid overcrowding.
8. Common Mistakes to Avoid
Overwatering: Damp soil is key, but waterlogged soil can rot the seeds.
Cold temperatures: Keep the seedlings warm (above 15°C / 59°F).
Poor soil: Use a well-draining mix to prevent root rot.
9. Tips for Success
Use fresh seeds: Hot peppers have a short shelf life. Use seeds within 1–2 years for best results.
Patience: Some hot peppers (e.g., ghost peppers) may take longer to germinate.
Monitor: Check the soil moisture daily and adjust as needed.
By following these steps, you’ll create ideal conditions for hot spicy pepper seeds to germinate and grow into healthy, heat-ful plants!
To grow hot spicy peppers (e.g., ghost peppers, Carolina Reapers, habaneros), the best soil and fertilizer combinations are critical for nutrient availability, root development, and heat concentration. Here’s a concise, evidence-based guide:
Best Soil for Hot Spicy Peppers
Soil Type: Well-draining, slightly acidic to neutral soil (pH 6.0–6.8).
Sandy loam (a mix of sand, silt, and clay with 3–5% organic matter) is ideal.
Loamy soil with high organic matter (compost, aged manure, or peat moss) improves moisture retention and nutrient retention.
Soil Amendments:
Add organic matter (compost, aged manure, or peat moss) to improve structure, aeration, and microbial activity.
Test soil pH and adjust with lime (to raise pH) or sulfur (to lower pH) if needed.
Avoid compacted or waterlogged soil, as it hinders root growth and nutrient uptake.
Container Gardening:
Use well-draining potting mixes with perlite, vermiculite, and compost.
Add garden lime if using peat moss to balance acidity.
Soil Preparation:
Amend garden beds with compost or well-rotted manure to enrich fertility.
Avoid planting in soil previously used for tomatoes, eggplants, or potatoes to prevent disease.
Best Fertilizer for Hot Spicy Peppers
Nutrient Balance:
Balanced N-P-K ratio (e.g., 10-10-10 or 5-5-10) for early growth.
High phosphorus (P) and potassium (K) during flowering and fruiting to support root development, fruiting, and heat concentration.

Organic Options:
Compost: Rich in organic matter and slow-release nutrients.
Fish emulsion: Balanced N-P-K with trace minerals.
Bone meal: High in phosphorus for root development.
Compost tea: Boosts microbial activity and nutrient availability.
Synthetic Options:
10-10-10 or 5-5-10 NPK fertilizers for quick nutrient delivery.
High-potassium fertilizers (e.g., 5-5-10) to enhance fruit quality and disease resistance.
Fertilization Schedule:
Early growth: Use nitrogen-rich fertilizers (e.g., fish emulsion) to promote leafy growth.
Flowering/fruiting: Switch to phosphorus and potassium-heavy fertilizers (e.g., 5-5-10) to support fruit development.
Avoid high-nitrogen fertilizers after flowering to prevent delayed fruit set.
Key Nutrients:
Calcium (in fertilizers) prevents blossom end rot.
Magnesium supports photosynthesis and overall plant health.
Key Tips for Success
Soil Testing: Regularly test pH and nutrient levels to adjust amendments.
Watering: Keep soil evenly moist but avoid overwatering (peppers dislike waterlogged soil).
Fertilizer Safety: Avoid over-fertilizing to prevent salt buildup or nutrient burn.
Container Gardens: Use well-draining mixes and regular fertilization due to rapid nutrient loss.
Example Fertilizer Recommendations
Organic: Compost, fish emulsion (5-5-10), bone meal.
Synthetic: 10-10-10, 5-5-10, or 5-10-10 NPK fertilizers.
Specialized: Products like Miracle-Gro’s Tomato, Fruit & Vegetable Plant Food (18-18-21) or Humboldts Secret Golden Tree (trace minerals + kelp).
By using well-draining, nutrient-rich soil and phosphorus/knowledge-rich fertilizers, you’ll maximize root development, fruiting, and heat concentration in hot spicy peppers. Always monitor soil pH and adjust fertilization based on plant health and environmental conditions.
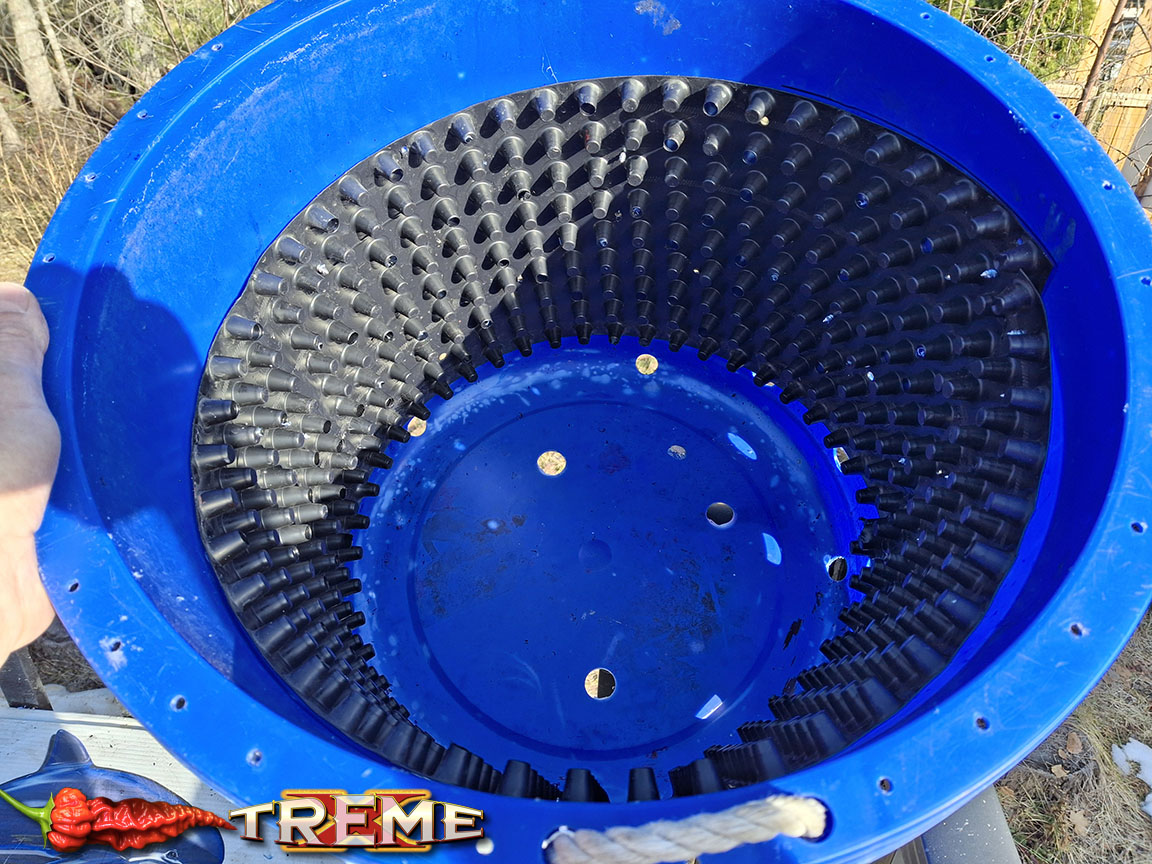
Here are samples of self terminating large pots I made for larger investments.
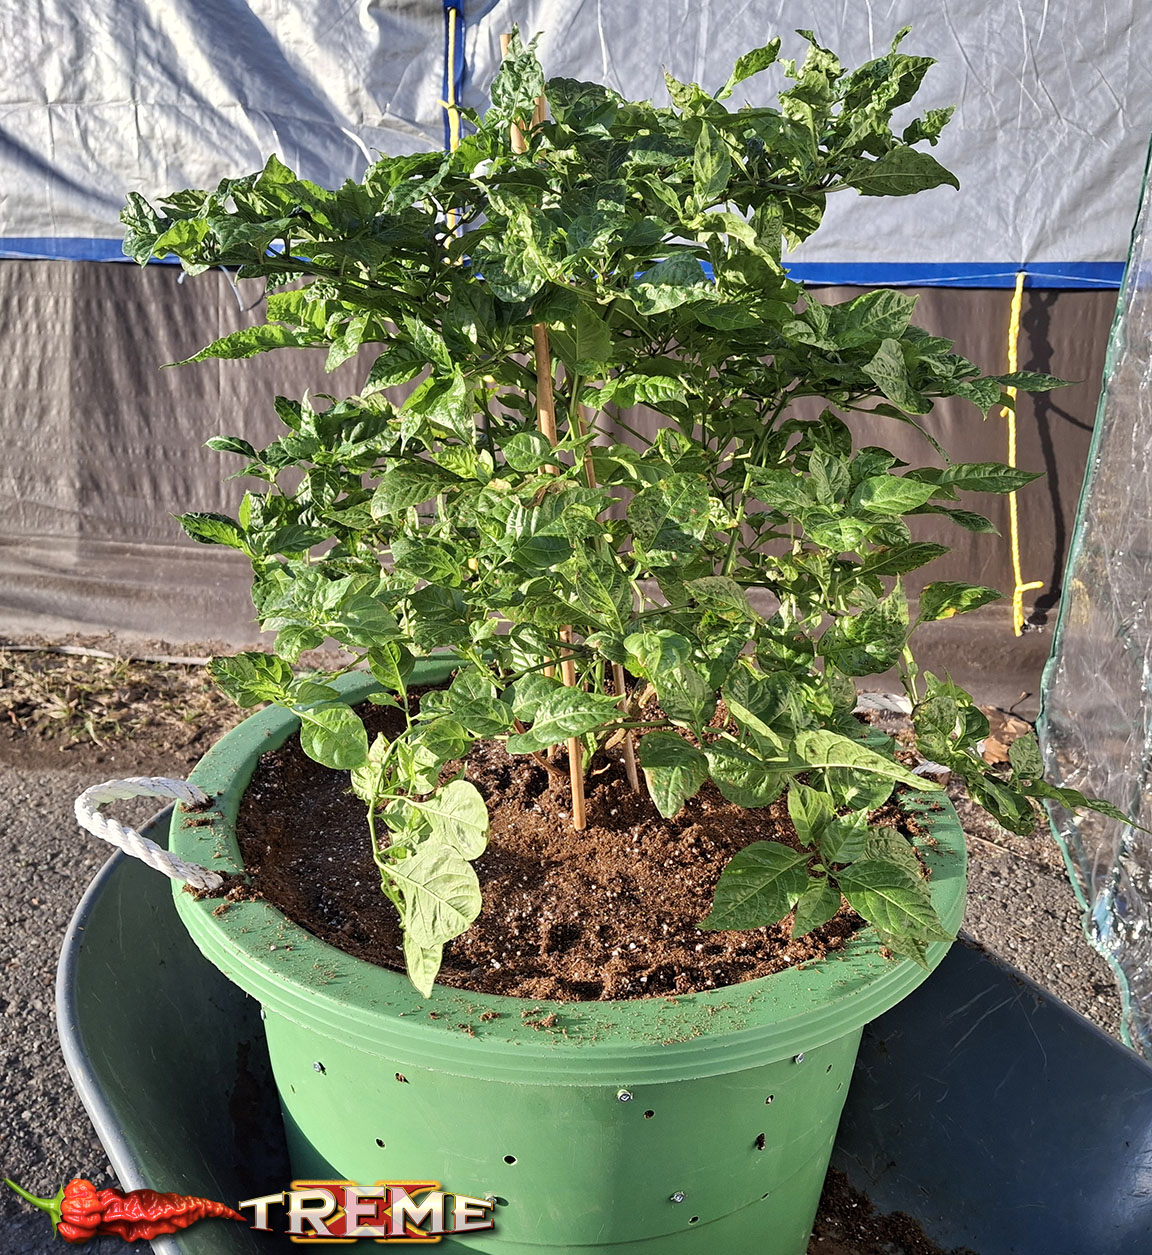
17 gallon
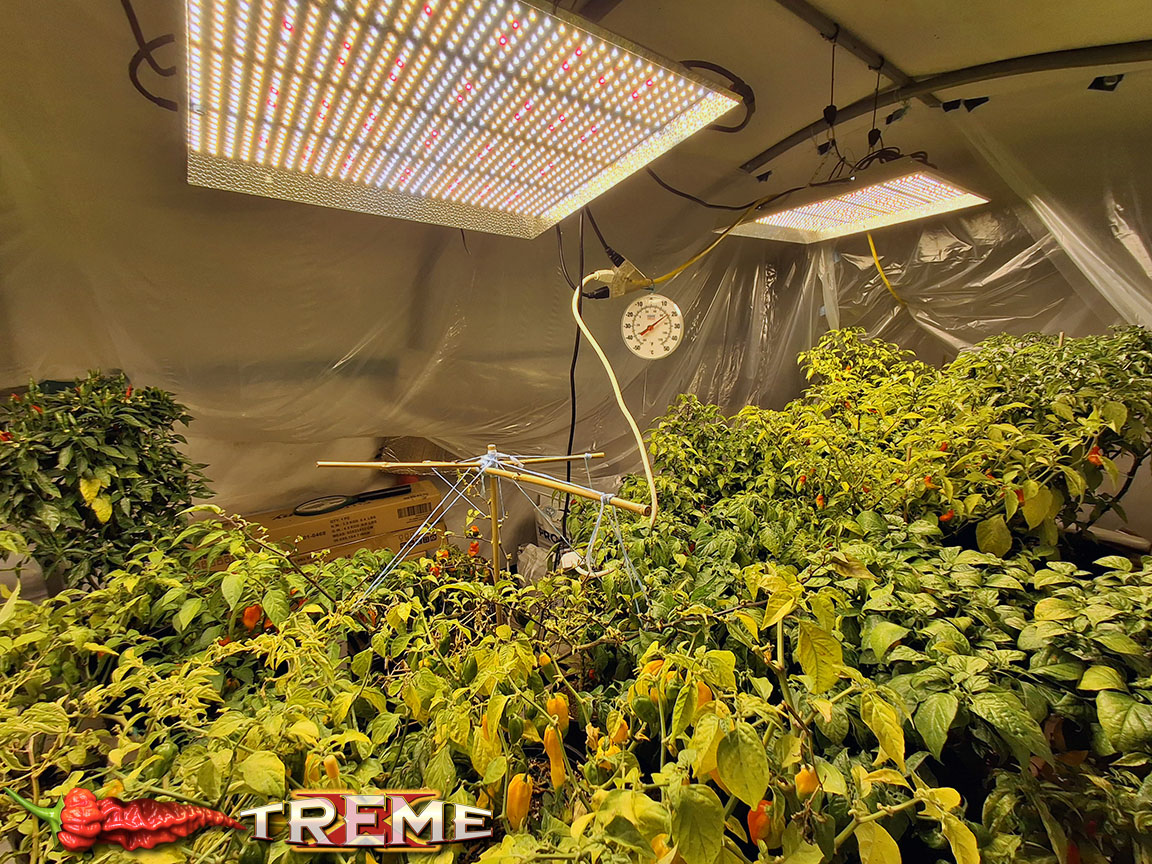
To grow spicy hot pepper plants indoors using LED lighting, you need to optimize light intensity, spectrum, duration, and placement to mimic natural sunlight and support the plant’s growth cycle. Here’s a step-by-step guide to achieve successful indoor cultivation:
1. Choose the Right LED Grow Light
Full-spectrum LED: Use a full-spectrum LED grow light (e.g., 5000K–6500K color temperature) that emits blue (450–460 nm) for vegetative growth and red (660–680 nm) for flowering.
Specialized Lights: For vegetative growth, use a blue-rich LED (e.g., 5000K). For flowering/fruiting, shift to a red-rich LED (e.g., 6500K–7000K).
Intensity: Use a 1000–1500 lumens per plant for small plants (e.g., pepper seedlings) and 2000–3000 lumens per plant for larger plants.
2. Light Duration
Vegetative Stage (Seedlings to 4–6 Inches Tall): Provide 14–16 hours of light per day (e.g., 14 hours on, 10 hours off).
Flowering/fruiting Stage (After 6 Inches Tall): Extend to 16 hours of light per day to support flowering and fruit development.
Avoid Overexposure: Use a light timer to ensure consistent, controlled light cycles.
3. Distance from Plants
Start at 12–18 inches: Place the light 12–18 inches above the plant to avoid leaf burn.
Adjust as Plants Grow: Move the light closer (6–12 inches) as the plant matures.
Avoid Direct Contact: Keep the light away from the soil to prevent root burn.
4. Light Spectrum for Spicy Peppers
Vegetative Growth: Focus on blue light (450–460 nm) to promote leaf and stem development.
Flowering/Fruiting: Shift to red light (660–680 nm) to enhance flowering, fruiting, and heat concentration.
Balanced Spectrum: Use a full-spectrum LED that combines blue and red wavelengths for optimal growth.

5. Environmental Conditions
Humidity: Maintain 60–70% humidity to prevent transpiration stress. Use a humidity tray or misting system.
Temperature: Keep the room temperature between 65–85°F (18–30°C). Avoid cold drafts or heat sources that could stress the plants.
Ventilation: Ensure good airflow to prevent disease (e.g., root rot, fungal infections).
6. Soil and Fertilizer
Soil: Use well-draining, nutrient-rich soil (e.g., a mix of peat moss, perlite, and compost).
Fertilizer: Apply balanced NPK fertilizer (e.g., 10-10-10) during the vegetative stage and high-potassium fertilizer (e.g., 5-5-10) during flowering.
Organic Options: Use compost, fish emulsion, or bone meal for slow-release nutrients.
7. Key Benefits of LED Lighting
Energy Efficiency: LED lights use less energy than traditional grow lights (e.g., MH or HPS).
Low Heat Output: Reduces transpiration stress and root burn.
Customizable Spectrum: Tailor light wavelengths to specific growth stages (vegetative, flowering, fruiting).
Longevity: LED lights last up to 50,000 hours, reducing the need for frequent replacements.
8. Example Setup
Light Type: Full-spectrum LED (e.g., 5000K–6500K).
Distance: 12–18 inches above plants.
Duration: 14–16 hours per day.
Fertilizer: 10-10-10 (vegetative), 5-5-10 (flowering).
Humidity: 60–70% (using a humidifier or tray).
9. Common Mistakes to Avoid
Overexposure: Keep the light 12–18 inches away to prevent leaf burn.
Underlighting: Ensure sufficient light (1000–1500 lumens per plant) to avoid stunted growth.
Over-fertilizing: Avoid salt buildup by using balanced, slow-release fertilizers.
By using LED lighting with the right spectrum, duration, and placement, you can successfully grow spicy hot peppers indoors. This method ensures optimal growth, heat concentration, and flavor development for high-quality, hot pepper plants.
I USE BOTH - LED AND CFL TYPES.

How to Sunshade Pepper Plants
Sunshading is a practical technique to protect pepper plants from excessive sunlight, heat stress, and sunburn, especially in hot climates or during intense sunlight periods. Here’s a step-by-step guide to effectively sunshade pepper plants:
1. Why Sunshade is Needed
Prevents Sunburn: Excessive sunlight can scorch leaves and stems, especially in young plants or hot climates.
Reduces Stress: Sunshade helps regulate temperature and prevents heat stress, allowing plants to focus energy on growth.
Optimizes Growth: In tropical or subtropical regions, moderate shade can enhance yield and flavor in some pepper varieties.
2. Materials Needed
Shade cloth (20–40% UV protection, 50–70% for heavy shade).
Poles or stakes (to support the shade structure).
String or rope (to tie the cloth to poles).
Tarp or burlap (for natural, temporary shading).
Garden tools (for installation).
3. Methods to Sunshade Pepper Plants
A. Use Shade Cloth
Best for: Large gardens, greenhouses, or outdoor pepper beds.
Steps:
Cut the shade cloth to the height of the plants (e.g., 6–8 feet for tall pepper plants).
Set up a frame: Use poles or stakes to create a rectangular or triangular frame.
Tie the cloth to the frame using string or rope.
Install the shade: Place the cloth over the plants during the hottest part of the day (e.g., midday).
Adjust as needed: As plants grow, reposition or extend the shade to maintain coverage.
B. Use Row Covers
Best for: Small gardens or seedlings.
Steps:
Drape a row cover (e.g., polyethylene sheet or old blankets) over the plants.
Secure the cover with strings or clips to prevent it from blowing away.
Remove the cover during cooling periods (e.g., evenings) to allow air circulation.
C. Use Natural Shade
Best for: Temporary or low-budget solutions.
Steps:
Place plants under trees, shrubs, or dense foliage (e.g., mango trees or sugar cane).
Use burlap or old sheets as temporary shade during peak sunlight.
Monitor the plants to ensure adequate light for growth.
D. Use a Tarp or Shade Net
Best for: Large areas or temporary protection.
Steps:
Drape a tarp (e.g., black or white tarp) over the plants.
Secure the tarp with stakes or strings.
Adjust the tarp as needed to block direct sunlight during the day.
4. Timing and Duration
When to Shade:
During the hottest hours (e.g., midday to late afternoon).
In hot climates or during heatwaves.
How Long:
Keep the shade in place during peak sunlight and remove it at night or during cooling periods.
5. Adjusting Shade Based on Plant Stage
Young Seedlings: Use light shade (20–30%) to protect delicate leaves.
Mature Plants: Use moderate shade (40–50%) to prevent sunburn and regulate temperature.
Flowering/fruiting: Use light shade to avoid overexposure and ensure optimal fruit development.
6. Monitoring and Maintenance
Check for Sunburn: Look for yellowing leaves, scorched stems, or wilting.
Adjust Shade: Increase or decrease shade coverage based on temperature and plant health.
Clean the Shade Material: Ensure the shade cloth or tarp is free of dust or debris to maintain effectiveness.
7. Benefits of Sunshading
Reduces heat stress and prevents sunburn.
Improves yield in tropical climates by regulating temperature.
Protects plants from extreme weather (e.g., heatwaves, storms).
Saves resources by reducing water stress during hot periods.
8. Key Tips
Avoid Over-Shading: Too much shade can stifle growth and reduce yield.
Use the Right Shade Percentage: 20–50% is ideal for most pepper plants.
Combine with Other Practices: Use mulching, watering, and proper spacing to enhance sunshading effectiveness.
Summary
Sunshading protects pepper plants from excessive sunlight and heat stress, ensuring healthy growth and optimal yield. By using shade cloth, row covers, or natural materials, you can regulate temperature, prevent sunburn, and create a favorable environment for your pepper plants.
Using Ladybugs to Control Aphids in Pepper Gardens - AND IF YOU SEE ANTS, YOU DEFINITELY HAVE APHIDS.

Ladybugs (also known as lady’s Mantle or ladybird beetles) are natural predators of aphids and are a key component of integrated pest management (IPM) in pepper gardens. Here’s how to effectively use ladybugs to control aphids while maintaining a healthy, sustainable ecosystem:
Why Ladybugs Are Effective Against Aphids
Predatory Behavior: Ladybugs feed on aphids, mites, and other soft-bodied insects. A single ladybug can consume up to 50 aphids per day.
Eco-Friendly Solution: Ladybugs are non-toxic, non-invasive, and beneficial to the garden ecosystem.
Natural Pest Control: They help reduce aphid populations without chemicals, preserving soil health and beneficial insects.
How Ladybugs Help Control Aphids
Aphid Suppression: Ladybugs target aphid colonies directly, reducing their numbers and preventing damage to pepper plants.
Ecosystem Balance: Ladybugs encourage biodiversity by controlling aphids, which are primary pests in pepper gardens.
No Chemical Residue: Unlike pesticides, ladybugs do not leave harmful residues on plants or soil.
Steps to Encourage Ladybugs in Your Pepper Garden
Provide Shelter:
Create habitats like leaf litter, small shrubs, or stone piles to protect ladybugs from predators (e.g., birds, spiders).
Avoid pesticides: Chemicals can kill ladybugs or disrupt their life cycle.
Plant Nectar-Rich Plants:
Grow flowers like marigolds, dill, or yarrow to attract ladybugs and support their life cycle (e.g., larvae, eggs).
Avoid Over-Exposure:
Keep pepper plants well-watered and well-ventilated to prevent aphid outbreaks.
Avoid over-fertilizing (excess nitrogen can attract aphids).
Introduce Ladybugs Naturally:
Ladybugs are attracted to aphid-infested areas, so leave the garden unharmed to encourage their presence.
Do not release ladybugs (they are not typically sold for pest control and may not survive in the wild).

Monitor and Maintain Balance:
Check for aphid infestations regularly. If ladybug populations are low, encourage their presence by providing food and shelter.
When to Use Ladybugs
Mild Aphid Infestations: Ladybugs are ideal for small-scale, natural control.
Severe Infestations: Use complementary methods (e.g., neem oil, insecticidal soaps, or beneficial insects like parasitic wasps) if ladybugs are insufficient.
Benefits of Using Ladybugs
Sustainable: No chemical inputs, reduces environmental impact.
Cost-Effective: Ladybugs are free to encourage and do not require expensive tools.
Ecosystem Health: Supports pollinators, beneficial insects, and soil microorganisms.
Important Notes
Ladybugs are not a "magic fix": They work best when combined with good garden practices (e.g., proper watering, soil health).
Avoid Over-Reliance: If aphid populations are severely out of control, consult a pest control expert or use targeted, eco-friendly solutions.
Example Scenario
If your pepper plants are infested with aphids, you can:
Avoid pesticides and leave the garden undisturbed.
Encourage ladybugs by providing shelter and nectar-rich plants.
Monitor the garden for ladybug activity and aphid decline.
By integrating ladybugs into your pest management strategy, you can protect your pepper plants while supporting a thriving, balanced ecosystem.
MATURE TOBACCO PLANTS ARE VERY STICKY!

hAVING A FEW tOBACCO PLANTS NEAR AND AROUND YOUR OUTSIDE GARDENS CAN HELP MITIGATE THE NUMBER OF FLYING APHIDS THAT COME EACH FALL SEASON TO FEAST.
AS PREVIOUSLY MENTIONED, IF YOUR INDOOR WINTER GARDEN HAS SOMEHOW ATTRACTED ANTS, THEN THEY WILL NOT ONLY FEED ON THE HONEYDEW, THOUGH MAY ALSO TAKE ladybugs as well.
In this instance, i have applied some honey on a sticky yellow strip. this attracts the ants, and then are stuck permanently.
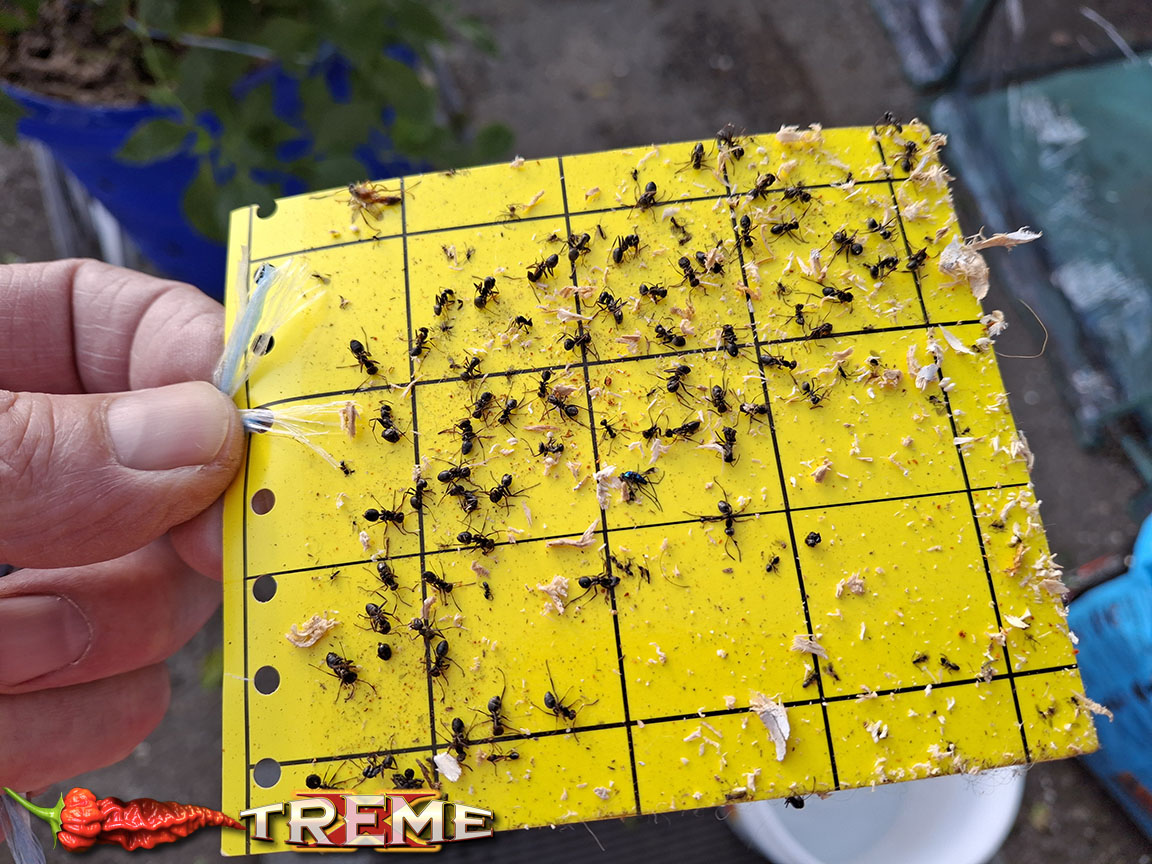
this is a good way to reduce their numbers.
also, spraying white vinegar in the surroundings will throw off their senses - thus unable to return to their nest.
TAKE NOTICE: WHEN USING CFL BULBS INDOORS, lADYBUGS WILL BE ATTRACTED TO NOT JUST THE HEAT, THOUGH THE MANY FLYING APHIDS WHICH IT ATTRACTS AS WELL.

FOR THIS REASON, IT IS WISE TO USE METAL SCREEN TO GOVERN THEIR CLOSENESS, OTHERWISE THEY WILL BE OVERCOME BY THE HEAT.
IN ADDITION, TINY FLYING APHIDS are able to PASS THROUGH THE SCREEN AND will BE TERMINATED IMMEDIATELY - by THE HUNDREDS.
uSing THIS TECHNIQUE is to YOUR greatest ADVANTAGE.
How to Overwinter Pepper Plants
Overwintering pepper plants (e.g., bell peppers, jalapeños, or chili peppers) is challenging because most are annuals and cannot survive cold temperatures. However, if you live in a mild climate or have access to indoor space, you can protect and overwinter them by bringing them indoors, using a greenhouse, or creating a sheltered environment. Here’s a step-by-step guide:
1. Prepare the Plants for Overwintering
Prune and Clean:
Remove dead leaves, stems, and flowers to reduce disease risk and stress.
Trim back the plant to 1–2 feet tall (this helps the plant enter dormancy).
Clean the plant to remove pests or debris.
Choose Hardy Varieties:
Some pepper varieties (e.g., dwarf bell peppers) are more cold-tolerant, but most peppers are not hardy and require protection.
Avoid Overwatering:
Let the plant dry out slightly before overwintering to prevent root rot.
2. Indoor Overwintering (Best for Mild Climates)
Method: Keep the plant in a cool, dark, and humid environment (e.g., a basement, garage, or indoor space).
Steps:
Move to a Protected Space:
Place the plant in a cool, dark room (e.g., a basement or closet).
Ensure good ventilation to prevent mold.
Control Temperature:
Keep the temperature between 40–50°F (4–10°C).
Avoid freezing (peppers can survive down to 30°F (-1°C), but prolonged cold can damage the plant).
Light and Humidity:
Provide indirect light (e.g., a windowsill or grow light).
Maintain 60–70% humidity using a humidity tray or misting system.
Watering:
Water sparingly (1–2 times per week) to keep the soil moist but not soggy.
Monitor for Dormancy:
The plant will enter dormancy (a dormant state) and not grow during winter.
3. Greenhouse or Cold Frame Overwintering
Best for: Growers with a greenhouse, cold frame, or sheltered outdoor space.
Steps:
Create a Microclimate:
Use a greenhouse or cold frame to insulate the plant from cold temperatures.
Control Temperature:
Keep the temperature between 40–50°F (4–10°C).
Use heating pads or insulated covers to protect against frost.
Light and Humidity:
Provide indirect light (e.g., a grow light or window).
Maintain 60–70% humidity to prevent dryness.
Watering:
Water sparingly to avoid overwatering.
4. Outdoor Protection (For Mild Climates)
Method: Use sheltered areas or cold frames to protect the plant from frost.
Steps:
Create a Sheltered Space:
Use a cold frame (a glass or plastic enclosure) to insulate the plant.
Place the plant in a sheltered spot (e.g., under a porch, against a wall).
Protect from Frost:
Cover the plant with insulated fabric or burlap during frost.
Use heat lamps or insulated covers to raise the temperature.
Monitor for Cold:
Check for frost and cover the plant if temperatures drop below 30°F (-1°C).
5. Transition Back to Outdoor Planting
When to Bring Back Outdoors:
Spring (after the last frost).
When temperatures stabilize (e.g., above 50°F / 10°C).
Steps:
Acclimate the Plant:
Gradually expose the plant to outdoor conditions (e.g., 1 hour per day for 7–10 days).
Plant in Soil:
Transplant the plant into well-draining soil (e.g., compost, perlite, and peat mix).
Water thoroughly to help the plant adjust.
Monitor for Growth:
The plant will resume growth after a few weeks.
Key Tips for Success
Do not overwater: Overwatering can kill the plant during dormancy.
Avoid direct sunlight: Indoor plants need indirect light to avoid stress.
Check for pests: Ladybugs, aphids, or diseases can damage the plant during winter.
Do not expect full growth: Overwintered plants may not grow as vigorously as new plants.
Alternative: Start New Plants in Spring
If overwintering is not feasible, it’s easier to start new pepper plants in the spring by planting seeds or transplanting seedlings. This is more reliable and less stressful for the plant.
Summary
By following these steps, you can protect and overwinter pepper plants in a mild climate. However, most pepper plants are not cold-hardy, and overwintering is not always practical. For best results, start new plants in the spring.
©2025 XTREME HOT PEPPERS. All Rights Reserved.